I know what you may be thinking. “I don’t like sauerkraut!” Well, first hear me out. You are probably talking about some sort of cooked sauerkraut that you had with some sausage which is probably the same type of sauerkraut you find in the condiment aisle next to the ketchup at the grocery store. This type of sauerkraut has been pasteurized and all of the beneficial bacteria are dead.
Ah, but raw, fermented sauerkraut is different! How you ask? Well, it has a lot of beneficial bacteria. Probiotics!! Probiotics are live microorganisms which are of huge benefit to us and our gut health. I could go on about the multiple benefits, but I will save that for another post.
You can buy raw, fermented sauerkraut at the grocery store. It is usually found in the refrigerated section of the store. The cost is usually about $10/pint jar. This can be pretty spendy considering that making it yourself is a lot cheaper. Granted, it does take time and a few initial items to get the first batch going, but if you make large batches and/or make some every couple of weeks, you will have ongoing sauerkraut to eat at minimal cost to what you would spend at the store. I recommend eating a couple forkfuls a day. Great as a side to eggs in the morning or mix it into your salad.
There are so many recipes for sauerkraut. This is just a basic recipe. Feel free to experiment!
Gather Up:
- 1 to 2 heads of green or red cabbage
- Optional Vegetables: onion, garlic carrot, kohlrabi, and/or radish
- Sea salt (rule of thumb is about 1 tablespoon per 2# vegetable matter) non-iodized as iodine can be antimicrobial
Utensils:
- Knife or Food Processor
- Large bowl
- Pint or quart jar (I find wide-mouth jars works best, especially if you want to get your hand in the jar to press down the veggies)
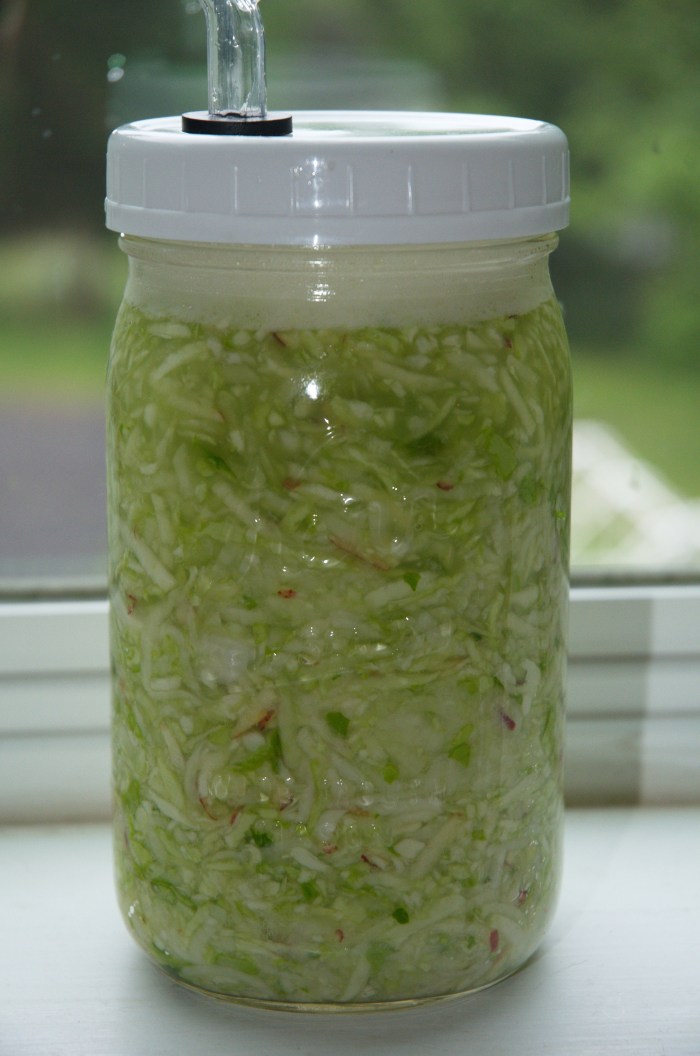
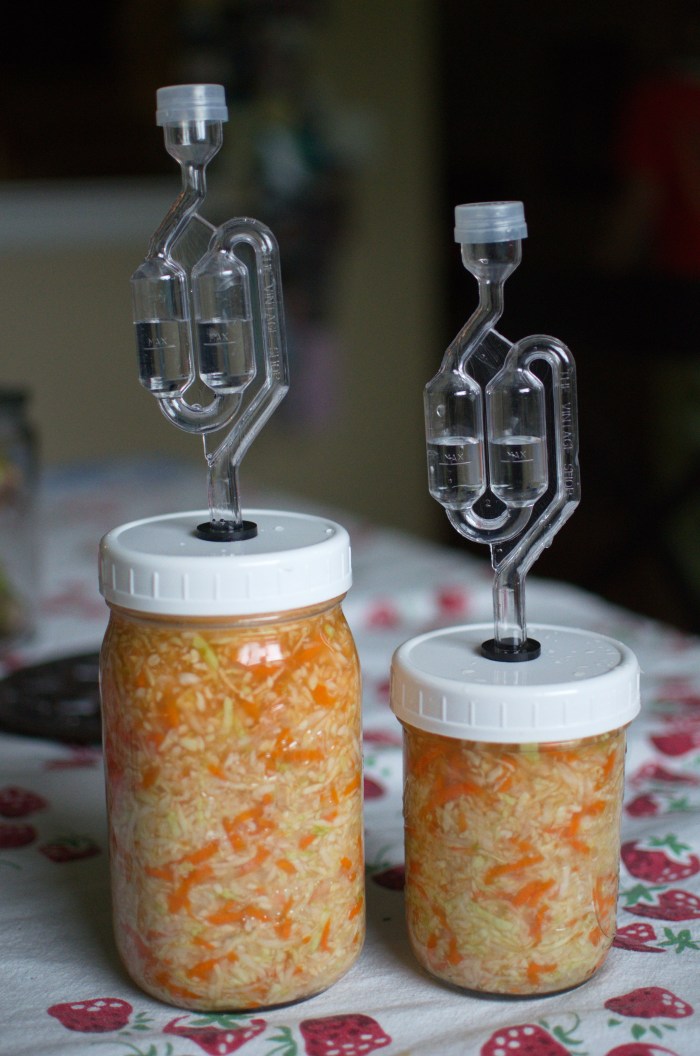
- For the top of the jar, you have a few options. Airlock plus plastic lid with grommet as I have used here. Airlocks and grommets can be purchased online or locally at any wine or beer making store. Plastic lids to fit wide-mouth jars (Ball makes a good brand of lid). Drill a hole into the lid at 5/8. You can also buy something like this instead of making your own. OR, instead of the airlock/lid, you can just use a floursack towel to cover your jar and secure with a rubberband; however, I find that the airlock technique works better for these smaller batches.
- Weight (stone or glass, not metal). I bought mine online, but you can probably find something in your house that would work just as well. Weights help keep the vegetables under the brine to allow it to ferment. Here is a link similar to the ones I use.
- Wooden tamper (optional) I bought mine online, but you can use your fist too.
- Cheesecloth (optional)
Core the cabbage and shred all the vegetables. Cut everything about the same size or use a food processor or shredder. Put them in a bowl.
Add salt to the vegetables and mix up thoroughly. Try a taste of the vegetable matter. It should be just that right amount of saltiness; not too little, not too much.
It helps to let it all sit for 10 to 15 minutes before putting it into the jar to allow salt to start drawing out the liquid from the vegetables.
Press vegetable mixture a handful at a time into jar with tamper. You can use your fist to pack it down as well, but I find the tamper is easier on the hands. Keep putting in the mixture and pack down to get rid of any air pockets. Brine will gradually start coming to the top.

You should get enough brine as you pack it down that will eventually cover the vegetables. If not, you could add just a bit of water, but not too much that it will dilute the salt. Leave about 1” from top. At this point I like to put a small piece of cheesecloth on top of the vegetables. This keeps pieces from rising up to the top.
Place the weight on top to hold the vegetables under the brine. The weight isn’t completely necessary, but if you do not have a weight, you will need to check the sauerkraut more often to make sure the vegetable matter is staying below the brine.
Wipe down the outside and rim of the jar to make sure it is clean and free of any pieces of vegetable matter.
Next, screw on airlock/lid. Make sure to fill the airlock half way with water. Or, if you are using a floursack towel, put that over the jar and place rubberband around the towel. Make sure the towel is not wet.
Let ferment at least 2 weeks at room temperature. I usually go 3 weeks for optimal probiotic-ness! Keep checking every couple of days to make sure the brine is over the vegetables. Pack it down more if not.
The taste of the sauerkraut will be more of a “pickled” taste for the most part, even though no vinegar was added. You will smell it fermenting, especially if you use a towel/rubberband. This is normal and it shouldn’t smell repulsive, just a slight sour/sweet type of aroma. When it tastes to your liking and has fermented long enough, put on a regular plastic lid and put in fridge to slow down the fermentation. It can last for months in the refrigerator.

I’m not sure I could do a couple forkfuls with eggs but sure do love real sauerkraut. I remember the days of turning up my nose at it because all I’d ever had was the not real stuff.
We usually buy Bubbies or gladly accept gifts from friends but have never actually made our own. We just might with the help of this post. Thanks!